
19 KiB


EdgeKey
EdgeKey is a full-stack card key shop system built with the Vike framework, deployable directly to Cloudflare. The same codebase includes frontend pages, SSR rendering, and backend API endpoints, all running on Cloudflare Workers.
Features
- 🚀 Truly Zero Cost — No server or domain purchase needed. Runs on Cloudflare's global edge network. One-click deploy, instantly live. Spend money on what matters, give yourself back your time.
- 🌍 Zero Ops — Built on Workers + D1. The free tier is sufficient for daily operations with no surprise bills.
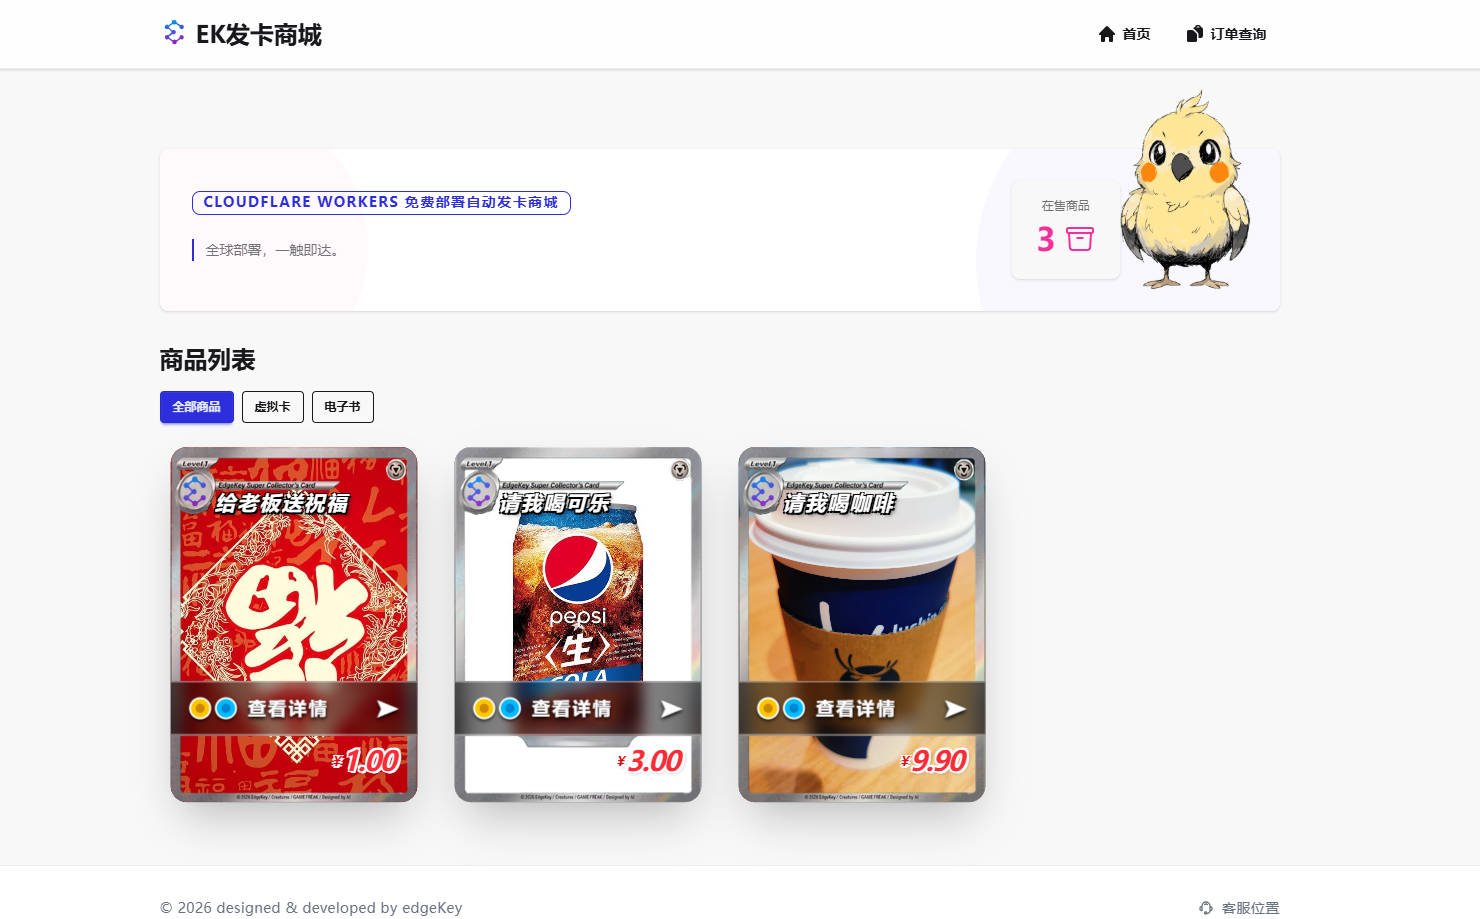
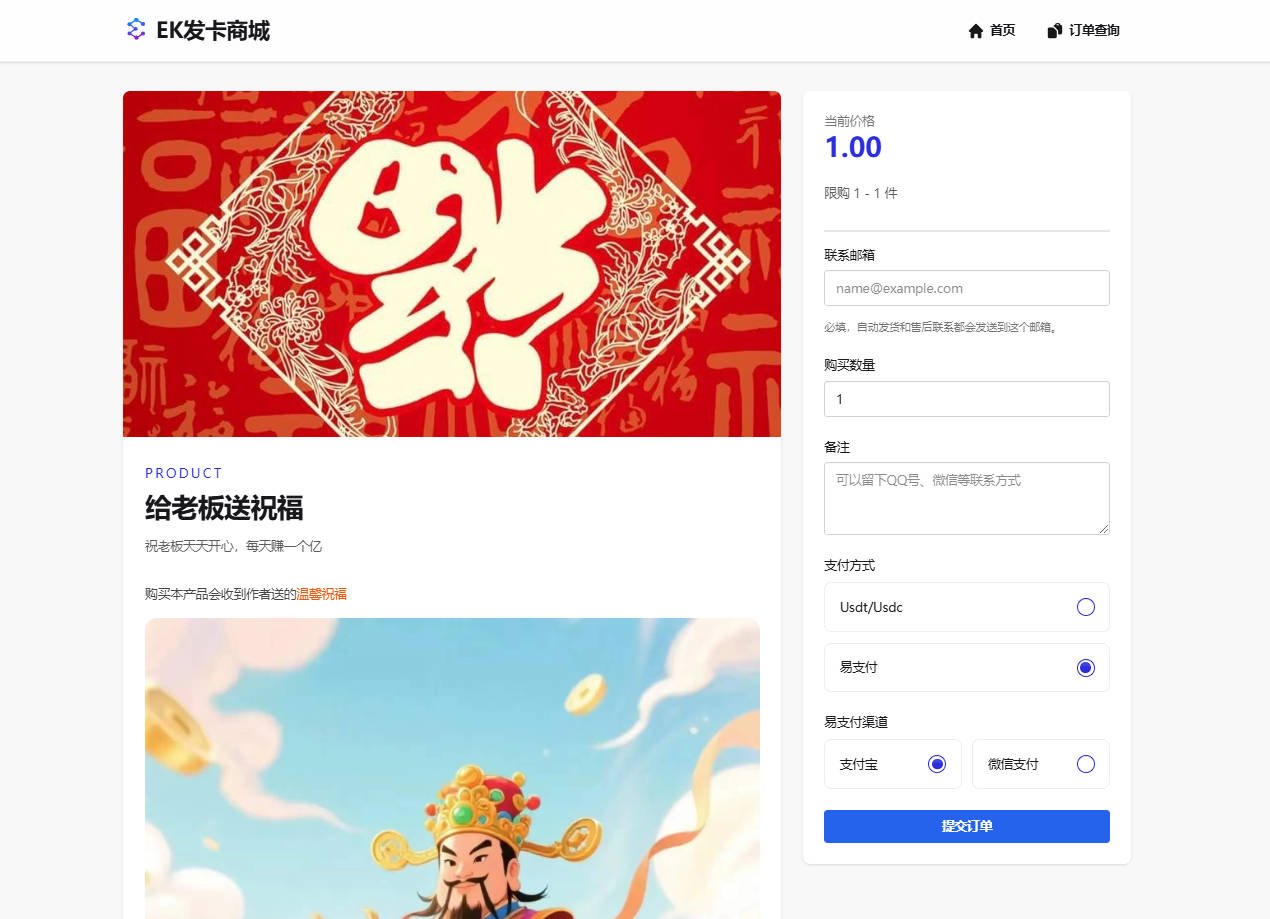
- 🛍️ Product Management — Supports categories, product listing/unlisting, inventory modes (limited/unlimited), and min/max purchase quantities.
- 🔑 Card Key Management — Bulk import card keys, automatic delivery after payment, real-time inventory alerts.
- 📦 Order Management — Order list, manual redelivery, auto-close expired orders, and detailed payment logs.
- 💳 Multiple Payment Gateways — Built-in BEpusdt (USDT) and Epay (aggregated payments), with plugin-style extensibility for more.
- 📧 Email Notifications — Supports SMTP / API / Cloudflare Email, with detailed email send logs.
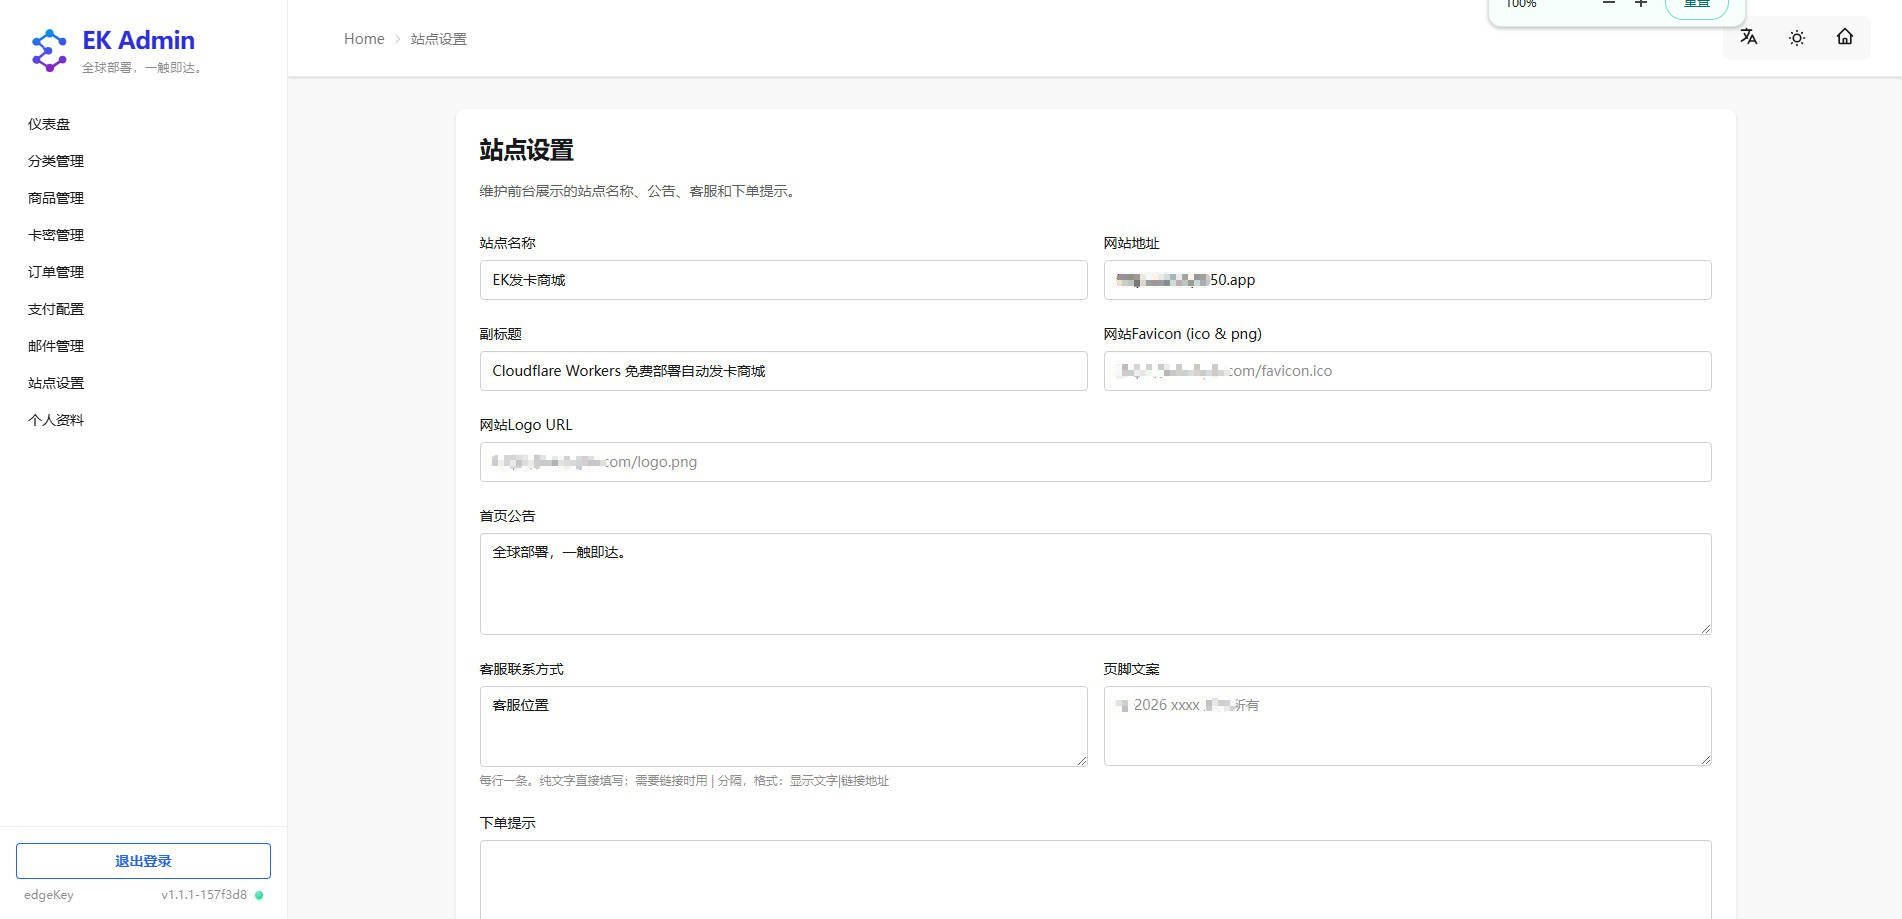
- ⚙️ Site Settings — Flexible configuration for site name, logo, announcements, and support contact.
- 🔐 Admin Panel — Secure administrator account system.
Tip
About zero-cost operation: When combined with a payment channel (USDT, self-hosted, etc.), personal SMTP, and a free image hosting service, this project can achieve 100% zero-cost operation.
Documentation
- Quick Deploy Guide
- Payment: BEpusdt, Epay, Alipay, Alipay Face Pay, Stripe
- Changelog
Screenshots
Quick Start
Three deployment methods are supported, ordered by recommendation:
| Method | Best For | Ease |
|---|---|---|
| One-Click Deploy (recommended) | First-time deploy, no local environment needed | ⭐⭐⭐ Simplest, fully automatic |
| Git Auto Deploy | Continuous iteration, auto-update on push | ⭐⭐ Fully automatic after one-time setup |
| Manual Deploy | Custom development, full control | ⭐ Requires local environment and CLI |
One-Click Deploy to Cloudflare Workers
After clicking the button, the Cloudflare Workers deployment wizard will open:
- Log in and authorize your Git account (GitHub/GitLab). It will automatically create a new repository under your account.
- For security, change the default secret (
AUTH_SECRET) in the wizard.- If you don't bind an existing D1 database, it will automatically create and initialize one (including admin account), no manual steps needed.
- After deployment, find a log entry like
Deployed edgekey triggers (0.38 sec) https://edgekey.youraccount.workers.dev— that URL is your site.https://edgekey.youraccount.workers.dev/adminis the admin login page. Default credentials:admin/admin123456. Change your password immediately after first login!
One-Click Deploy FAQ
If Cloudflare shows an error like "Unable to fetch repository content", it's usually because your GitHub authorization has expired or become invalid. Unbind and re-authorize your Git account to fix this.
One-click deploy and manual deploy have conflicts in the wrangler.jsonc configuration. Commands starting with wrangler d1 require database_id to be configured. Fill in your Database ID, otherwise you'll get errors. Affected commands include npm run up and commands starting with npm run db:.
Updating After One-Click Deploy
a. First update:
git remote add upstream https://github.com/34892002/edgeKey.git
git fetch upstream
git merge upstream/main --allow-unrelated-histories
git push origin main
b. Subsequent updates:
git fetch upstream
git merge upstream/main
git push origin main
Run the above commands in your repository to update to the latest code. After
git push origin main, Cloudflare will automatically detect the changes and trigger deployment.
Git-Connected Cloudflare Auto Deploy
If you use Cloudflare Workers' Git integration (auto-deploy on GitHub/GitLab push), complete these prerequisites first:
Cloudflare Turnstile (Admin Login CAPTCHA)
The project now supports integrating Cloudflare Turnstile widget on the admin login page to block automated brute-force attacks.
You need to create a site in Cloudflare Dashboard's Turnstile and configure the following environment variables:
TURNSTILE_SITE_KEY: Frontend widget Site KeyTURNSTILE_SECRET_KEY: Server-side verification Secret Key
Use the following commands to configure Turnstile for the project:
wrangler secret put TURNSTILE_SITE_KEY
wrangler secret put TURNSTILE_SECRET_KEY
Notes:
- When both variables are unconfigured, Turnstile is disabled by default and doesn't affect existing login flow
- When both variables are correctly configured, the admin login page will automatically display the Turnstile widget with server-side enforcement
- If only one variable is configured, the system treats it as unconfigured to avoid half-configured states
0. Prerequisite: Create a D1 Database in Cloudflare Dashboard
- Create database with name
edgekey-db - Record the database ID
database_idfor use in deploy commands
Table schema and seed data are initialized automatically by the deploy script on first deploy.
1. Deploy Command
Since wrangler.jsonc requires your actual D1 database_id, set the build command in Cloudflare's "Build Configuration" to:
sed -i 's/"database_name": "edgekey-db"/"database_name": "edgekey-db", "database_id": "YOUR_DATABASE_ID"/' wrangler.jsonc && bun run deploy
2. Configure AUTH_SECRET Environment Variable
In the Cloudflare Workers Git integration "Advanced Settings":
- Add variable name
AUTH_SECRET - Enter your secret string as the value
- Check the "Encrypt" option
Manual Build & Deploy
Before deploying to Cloudflare for the first time, create and initialize the D1 database:
-
Login and create the database
bunx wrangler login bunx wrangler d1 create edgekey-db -
Bind the Database ID Copy the
database_idfrom the terminal output intowrangler.jsonc:
"d1_databases": [
	{
		"binding": "DB",
		"database_name": "edgekey-db",
		"database_id": "YOUR_UUID_HERE", // <-- add this line
		"migrations_dir": "prisma/migrations"
	}
]
-
Initialize remote table schema
bun run db:migrations:remote -
Seed admin account and initial data
bun run db:seed:remote -
Configure AUTH_SECRET Run the command and enter your secret string as prompted:
bunx wrangler secret put AUTH_SECRET -
Generate Prisma Client and deploy
bun run db:generate
bun run up
bun run up is equivalent to build + publish:
vike buildwrangler deploy
See wrangler.jsonc for deployment config (main points to Photon's Cloudflare server-entry virtual entry).
Security Notes (Important)
The project uses admin username/password login. Before using in production:
AUTH_SECRETmust be configured in the Cloudflare production environment. Without it, an exception is thrown and admin login is blocked.- See the deployment sections above for configuration instructions.
- Production command:
wrangler secret put AUTH_SECRET - Default admin credentials:
admin / admin123456— change your password immediately after first login.
Forgot Your Password?
Reset your password to admin123456 via the D1 Console in Cloudflare Dashboard. How to execute SQL:
UPDATE Admin SET passwordHash = '$2b$10$viMe8RgcpM30gmmF9OpOcuA/QgleSIUk5VRtqjOulfSIbgK5jQCI6' WHERE username = 'admin';
- Log in and change your password immediately.
Local Development
Bun is recommended (npm/pnpm/yarn also work).
bun install
Since this project uses Cloudflare D1, you must initialize the local D1 simulator schema before starting the dev server for the first time:
# 1. Generate Prisma Client (required after first install)
bun run db:generate

# 2. Apply all migrations to the local Wrangler simulator
bun run db:migrations:local

# 3. Seed admin account and initial data
bun run db:seed

# 4. Prepare .env file
# Fill in required env vars (e.g. AUTH_SECRET) in env.example, then copy to env.

# 5. Start dev server
bun run dev
Cloudflare Platform Operations
How to Create Database
- Go to dash.cloudflare.com → Storage & Databases → D1
- Click Create on the right side to enter the D1 database creation page
- Fill in the database name in Name, and for Location generally select "Automatic... nearest available region" if no special requirements
How to Get Database ID
- Go to dash.cloudflare.com → Storage & Databases → D1
- All your created databases will be displayed on the right side
- Find the database you want to operate on, e.g.,
edgekey-db, and click the correspondingUUIDto copy the ID
How to Execute SQL
- Go to dash.cloudflare.com → Storage & Databases → D1
- All your created databases will be displayed on the right side. Click the database name you want to operate on, e.g.,
edgekey-db - Click the top tab → Console
Cloudflare D1 + Prisma Local Dev Workflow
This project follows the official Prisma + Cloudflare D1 guide best practices.
D1 Transaction Limitations & Solutions
Warning
Cloudflare D1 does not fully support Prisma's interactive transactions (
prisma.$transaction(async (tx) => {...}))
According to Cloudflare Workers SDK Issue #2733, D1 has limited transaction support, and the official team has stated no plans to add full interactive transaction support.
This project's solution: Compensating Transaction
For scenarios requiring data consistency (such as order creation + payment initialization), this project uses the following pattern:
// 1. Execute the main operation first
const order = await createOrderRecord(prisma, {...});
// 2. Attempt the related operation
try {
  const result = await createPaymentForOrder(order.orderNo, prisma);
  return result;
} catch (error) {
  // 3. If failed, execute compensating operation (delete created records)
  await prisma.order.delete({ where: { id: order.id } })
    .catch(e => logger.error("Compensating delete failed:", e));
  throw error;
}
Advantages:
- ✅ Fully compatible with D1 limitations
- ✅ No dependency on database transaction features
- ✅ Ensures data consistency
- ✅ Complete error logs on failure
Notes:
- The compensating delete itself may fail (edge cases), so logging is required
- Suitable for most business scenarios, but not for high-concurrency race condition sensitive scenarios
- For stronger consistency guarantees, consider adding additional state checks at the application layer
Current Runtime Mode
bun devruns in a Cloudflare-style local environment; Prisma connects to the local D1 simulator viaenv.DB.- After
bun run up, Prisma connects to remote D1 via the sameenv.DBbinding. DATABASE_URLin.envis only used by the Prisma CLI/config layer, not at runtime.- The current
prisma/schema.prismaonly retains the Cloudflare client generator; runtime usesgenerated/prisma/client. - Therefore, the current database runtime mode is: local D1 for development, remote D1 for production.
Correct Database Development Workflow
When modifying the database schema, follow this process strictly:
Step 1: Modify schema and generate SQL migration
After modifying prisma/schema.prisma, do not use the regular migrate dev. Instead, use migrate diff to generate the SQL script:
# Since Cloudflare D1 is completely different from regular MySQL.
# Regular Prisma migrate dev relies on a long-running database connection to compare states,
# create shadow database, etc., which D1 doesn't support.
# For incremental migrations (modifying existing table structure):
# New Prisma has deprecated --from-local-d1, recommended to use --from-migrations
bunx prisma migrate diff \
  --from-migrations prisma/migrations \
  --to-schema prisma/schema.prisma \
  --script > prisma/migrations/0002_xxx.sql
Migration File Restrictions
- Existing migration files in
prisma/migrations/are considered historical records. Do not modify, rename, or delete them. - Database changes can only be made by adding new migration files, e.g.,
0002_*.sql,0003_*.sql. - Only when you explicitly want to rebuild all databases and no longer support any old database upgrades can you redo the migration history.
- If you need to fix the impact of old migrations, do not modify old files. Instead, add patch migrations or adjust the deployment process.
- Before committing, ensure
schema.prismais consistent with migration file responsibilities, avoiding duplicate field definitions across multiple migrations.
Step 2: Sync to local D1 simulator (for local dev/testing)
bun run db:migrations:local
If you skip this step, accessing pages with bun dev will show no such table errors.
Step 3: Sync to Cloudflare remote (before publishing)
bun run db:migrations:remote
Both local and remote need to be executed once separately.
Daily Dev Commands
bun dev
The above command starts the local dev server and connects to the local D1 simulator using the D1 binding defined in wrangler.jsonc.
Telefunc Notes
- Telefunc functions are placed in the corresponding page directory, ending with
.telefunc.ts. - On Windows +
bun dev+workerd, Telefunc's dev-mode naming/co-location check triggers a path compatibility issue, so it is disabled inserver/telefunc-handler.ts. This does not affect actual Telefunc loading or invocation.
⚠️ Never do the following:
- Do not assume
bun devusesprisma/db.sqlite— it uses the local D1 simulator. - Do not use
prisma migrate dev— it deviates from the D1 migration workflow. - Do not overwrite
prisma/migrations/0001_init.sql— keep init and incremental migrations separate. - Do not trust Prisma-generated migration SQL blindly. Always review scripts manually, specifically watch for unexpected DROP TABLE or full rebuild logic, ensuring migrations are incremental and don't overwrite existing data.
Code Standards
TypeScript Type Import Standards
All type imports must use import type at the top of the file. Inline import() usage in variable declarations, function parameters, generics, etc. is prohibited.
// bad: inline import
function handle(data: import("./types").SomeType) { ... }
// good: top-level import
import type { SomeType } from "./types";
function handle(data: SomeType) { ... }
Tech Stack
- Framework & Rendering: Vike (file routing + SSR), Vue 3
- Server / Runtime: Hono, Photon, Wrangler
- Data & Mutations: Telefunc, Prisma, D1 (Cloudflare native SQLite)
- UI: Tailwind CSS, daisyUI
- Auth: Auth.js (admin username/password login)
Project Structure
.
├─ assets/                 # Static assets
├─ components/             # Reusable components (non-route pages)
├─ pages/                  # Vike file routing (pages co-located with components/styles/types)
│  ├─ +config.ts           # Global config (title, SSR, etc.)
│  ├─ +Layout.vue          # Global layout
│  ├─ +Head.vue            # Global head tags
│  ├─ tailwind.css         # Tailwind + daisyUI entry
│  ├─ index/+Page.vue      # Storefront home (/)
│  ├─ product/+Page.vue    # Product detail (/product/:slug)
│  ├─ query/+Page.vue      # Order query (/query)
│  ├─ order/+Page.vue      # Order detail (/order/:orderNo)
│  ├─ admin/               # Admin panel (/admin)
│  └─ _error/+Page.vue     # Error page
├─ server/                 # Server entry (Hono) and middleware
│  ├─ entry.ts
│  ├─ authjs-handler.ts
│  ├─ prisma-middleware.ts
│  └─ telefunc-handler.ts
├─ lib/                    # Business logic (payment adapters, delivery, etc.)
├─ modules/                # Feature modules (payment notifications, orders, etc.)
├─ scripts/                # Helper scripts (seed data, validation)
├─ prisma/                 # Prisma schema and migration SQL
│  ├─ schema.prisma
│  └─ migrations/
│     ├─ 0001_init.sql
│     └─ 0002_xxx.sql
├─ vite.config.ts          # Vite plugin config
├─ wrangler.jsonc          # Cloudflare Workers config
└─ package.json            # Scripts and dependencies
About + Files (Vike Convention)
Files prefixed with + in pages/ are Vike "convention interface files" for declaring pages, config, and data loading. Files without + are treated as regular modules (components, styles, types).
Common + files:
+Page.vue— page component+data.ts— page data fetching (SSR/CSR shared)+Layout.vue— layout wrapper+Head.vue— head tags+config.ts— page/global config
Log Troubleshooting
When email or payment callback issues occur, check Workers logs in Cloudflare Dashboard:
Real-time production logs: bunx wrangler tail --format pretty
- Go to dash.cloudflare.com
- Left menu → Workers & Pages → click edgekey
- Top tab → Observability
- Filter logs by keyword, e.g.:
email.notify_order_paid.config_failed— email config fetch failed after paymentemail.send.failed— email send failedemail.order_paid.failed— email notification failed after successful paymentpayment.notify.route_exception— payment callback routing exceptionpayment.notify.context_missing— payment callback missing DB contextpayment.notify.diagnostic— payment callback validation exception (signature error, amount mismatch, etc.)bepusdt.verify_notify— BEpusdt callback raw payload (info level)
Acknowledgements
Thanks to the Linux.do and NodeSeek communities for their support.
Thanks to the following open source projects:
- BEpusdt — Cryptocurrency transaction support
- worker-mailer — SMTP email support in Workers environment
🏝️ Get Involved
- Telegram Group: https://t.me/edgeKeyChannel
- Telegram Channel: https://t.me/edgeKeyGroup